Here's one of the Little Sleepy Teddys (LST for short) with his head under construction.
The pattern differs from those I usually make because it does not have a gusset. It's actually easier in one way, because I can add the facial features first of all, before any stuffing is involved. So, this will be the way I shall make these little fellows in future.
(As I go on, I may experiment with the other Bears and Toys as well: there's something to be said for being able to put in the noses at the same time as fitting the eyes prior to stuffing. It's one of the real fascination of toy-making for me. One can make one's rules up as one goes along - just to suit oneself!)
Once the head was complete, the next thing on the agenda was the body. Again, the pieces are arranged in a different way, with the back piece having no middle seam, and the shape being made by darts at strategic intervals along each side.
The legs and arms are incorporated into the back, while the side seams become the other half of each leg and arm and the whole body is finally closed by the front seam. I had some difficulty deciding where to place the ColdhamCuddlies label (you can see some of them in the background waiting to be attached to future Cuddlies), trying the first one on the leg side seam and the other one under one arm on a side seam.
I sew these labels in making sure they do NOT come off easily, and the final result does not become apparent until the whole toy is stuffed. Thus,although I don't have a picture of it, in future that labels for LST will be on the side seam, under the right arm. I decided to leave this one - on the first version - on the leg seam, as I did not want any problems with the plush fur to become apparent.
This picture shows the head and body awaiting stuffing - just as happened when the reconstruction of Little Brown Ted took place (see the post on August 16):
Sewing the two bits together is actually a great deal easier with this particular pattern and will be a great encouragement to repeat the process should these little guys find their Forever Homes quickly. I began to sew under the chin, using a ladder stitch, and matching the seams around the neck. A few stitches (literally) later and hey viola! - Little Sleepy Teddy was complete.
 |
| Litttle Sleepy Teddy - Etsy Listing # 107350612 |
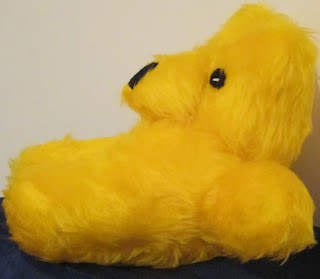
Just some extra photos showing these little chaps from different angles.
 |
| LST'S don't sit or stand easily: they're easier to cuddle this way! |


I love the yellow!
ReplyDeleteOh and by the way I think I got the follow button fixed on my blog im not sure...
He's so cute! - In that one picture (third picture from the bottom) it looks like he just received applause from the audience and is bowing down - too cool!
ReplyDeleteThey are all very sweet and cuddly. Thanks for sharing the process of creating your magic little teddys. Hi to Cy Bear.
ReplyDeleteVery nice tutorial, he is sooo cute :)
ReplyDeleteSo cute! Stopping by and saying 'Hi' from Blogging buddies:)
ReplyDelete