We've been very busy here in the ColdhamCuddlies Shop this week, with Isobel spending a lot of time marketing us Toys (that's what she calls all the time she spends on the computer!) as well as sewing new Poultry Toys.
We've now got 3 more Chickens in the Coop, and 3 new Ducklings - and I'm delighted to say that the Chicken and Duckling promised to our Friend, MrsSF (who provided Isobel with the original patterns for the toys - as I told you last week) were sent off on Friday. They arrived in Worcester, in the UK West Midlands (we live in the East Midlands!) on Saturday. We received a very nice message from MrsSF to the effect that she was pleased with the way they'd turned out!!
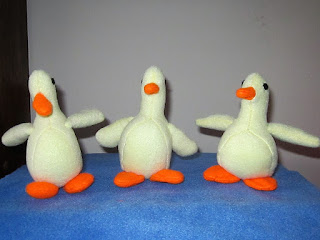
Here's one of the farewell photos that Isobel took before the pair left for Worcester. We've found that these Ducklings and Chickens really do need a dark back ground if they are going to show up on any pictures!!
Now to the second phase of making the Ducklings - having left off last week, where I told you that Isobel likes to begin her toy-making by sewing up the "peripherals" - the beak, and feet - for the Ducklings, in this case.
She's now made three more Ducklings since these photos were taken. The pictures were used for the listing in our Toy Shop (COLDHAMCUDDLIES.etsy.co) -
https://www.etsy.com/uk/listing/508463030/baby-duckling-toys-yellow-duck-toys-baby?ref=shop_home_feat_1
and has now got the production process down to just over 2.5 hours from beginning with the beak, then doing the feet and wings, sewing up the body and finally attaching the feet and wings.
The process is as follows:
Once the feet are sewn and turned inside out, Isobel stuffs them lightly, and creates a "web-look" by sewing through the stuffing on each foot. Then having sewn the beak and turned it inside out, she rolls the beak and attaches it to the spot on the Duck's head where that should be. She then sews the eyes in place.
To make the eyes, Isobel makes a knot at the end of a piece of Black Double Knit Yarn. She decides the spot on the head (on each side) where the eyes should be placed, and then using a darning needle, she pulls the knotted piece of wool through, with the knot on the right side of the Duck's head. (The process is repeated on the opposite side of the body/head piece). She then fiddles with the knot, gets it into place, and then - using matching black cotton - she stitches the knotted wool into an eye shape, and finishes off the whole process (on the wrong side of each body-piece) to make sure the knot/eye remains in place. Choosing the right spot is helped, in the case of the Duckling Toys at least, because when the beak is in the right spot, the tip is pretty well where the eye needs to be!
Then the body pieces are sewn together. Over the week, she's found it's best to sew the body sides to the body front - from under the beak to the tail, first. She sometimes then sews the body back half-way to the tail, leaving an opening through which the stuffing is pushed. (MrsSF suggested we left the gap under the tail area, but Isobel found it easier - with her arthritic fingers - to do it via the back). Then the whole Duck's body is turned inside out and the stuffing pushed through and manipulated into place to produce a Duck Toy that looks like the middle one in the photograph below.
The two feet are then sewn in place onto the body of each Duckling and then the COLDHAMCUDDLIES label is sewn under what looks like the tail of the Toy Bird. That helps to make sure that the Toys stay more or less upright. They can also be "persuaded" to stay that way by some pressure being applied from on top of the body!!
Then the wings - you can see them on the right of the middle toy in the picture above - are each lightly stuffed and sewn into place on each side of the body, and you are left with the completed Toy - ready to take "wing" to wherever.....
Here are the completed original three Ducklings. One, as I've said already, has been sent to MrsSF (the one in the middle of this photograph, actually.) The one on the right of the picture was the one selected by AB, son of MrsHB - who lives in Edmonton, Alberta, Canada - and is the lady who ordered one of the Ducklings almost immediately it was first listed in our Shop a week ago, yesterday. The third one, who was provisionally booked by one of Isobel's friends at Mass last week, is still with us. but has been joined by two more fully-fledged Duckling toys, with another in the process of being made.
Here's how they look in our Etsy Shop (link given earlier in this post) - beginning with the one just above us. Then:-
 |
| A side view of the Duckling Toys |
 |
| The Ducklings from the rear |
 |
| The Duckling Alberta-bound. |
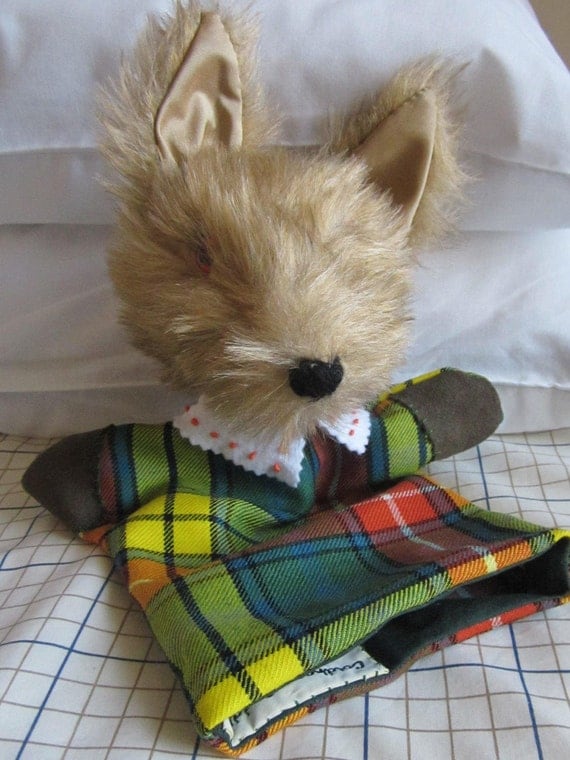
We also received an order, early last week, for one of our Fox Hand Puppets this week - see below
 |
| A similar Hand Puppet Toy to this Coyote, but with a Fox Head instead. |
The one chosen from the Shop had recently found a Forever Home, and what with Ducklings and Chickens, Isobel had not had time to replace it. So the Order will be fulfilled and sent off after Easter. It will still reach it's intended destination in good time - and well before the official dispatch date on the Order itself (which is not until the end of April).
Isobel is due to spend the Easter week-end in High Wycombe, Buckinghamshire, with her daughter, Philippa. This time - as she's only going to be away for 5 days, and has a busy schedule of activities already fixed down there - she's not taking the computer with her. Thus, there will be NO BULLETIN from here next Sunday. I shall be in charge of the Shop - supervising the Toys from my spot on Isobel's bed.
So I'll close this post by wishing you ALL a very Happy Easter, and look forward to telling you about the Fox Hand Puppet and the preparatoons for its final destination - Santa Cruz, California, U.S.A. - in two weeks' time.
Until then, have a wonderful holiday Everyone.
Cy Bear, Your Furry Friend.


