
Cy Bear back again, this time in a bit of a hurry. Things are hotting up in these parts, and I don't necessarily mean just the weather! Last week's post about our latest Golf Club cover, our Otter Club Cover may - or may not; one can never tell we find - have resulted in two new orders for the same kind.


One, when they are made shortly, will be off to New York State, U.S.A.: the other will be headed shortly afterwards to Austin, Texas,U.S.A. There's just about two days in between the receipt dates for their respective orders, so I'd guess that Isobel will be making these in tandem, as it were!
Meanwhile, Isobel decided to have a bit of a break from Clerical Bear production - even though we collected an off-Etsy order for another Padre Bear (which now makes 20 sales to date!) last Monday when Isobel was at a St.Barnabas Cathedral Craft Group meeting. She was helping to finish off the banner-making in which she and her fellow member have been involved since the beginning of 2019. We already have an order in for another Sister Breda Blue Nun Bear (the third or fourth version since she was originally introduced early in 2019). As you can see, Isobel is being kept well out of mischief!!
As a breather from Bear-making (do not understand why she should need one, mind you!) Isobel embarked on having a go at making a brand new Golf Club Cover. After all, it is golfing season now - at least that's what I'm told - and when making the Otter earlier in the year, she felt she had been challenged to have a go at making another kind, as she mentioned in last week's post.
We'd found a pattern for a bird (not a Peacock one - there were plenty to choose from, but none that looked like one we could use for our purpose) that Isobel felt she could use to create what she was aiming for - from that well-known site Pinterest:

This was traced off, and Isobel stuck it on to some of the cardboard (formerly cereal boxes, kept especially for this purpose!). After cutting out each piece as printed, she then created a slightly larger version which she felt would be a better finished size for the Peacock Golf Club cover she was aiming for.
The materials needed for making the Peacock Club Cover had been in hand since the challenge had been received. So, she first knitted up the metal handle cover - this time using a chunky yarn, rather than the usual double knit variety she usually uses. That's proved to be a wrong decision, because she's currently involved in re-knitting the finished cover, because the original was just not wide enough to accommodate the club head when it is put together. Isobel couldn't remember exactly the size of knitting needle best suited to this weight of wool, so she guessed, and although it looked good, it hasn't yet proved to necessarily be the right choice - not wide enough to give sufficient space for easy placing/removal of the wooden club head.

The two small bits on the right of the picture above are the proposed wings made in felt, and backed with a spare piece of white long-pile plush, which Isobel is now using as stuffing for club covers. It's less bulky than full-on stuffing, and seems to work well. During the week, however, she decided to cut out another set of wings in felt, remove the plush backing, and sew a second felt backing to each wing. The plush was making the wings out of proportion to the body of the proposed Peacock! However, the rest of the bird pattern was sewn with the white plush fabric to make the body. It's meant, in this version anyway, that every piece has needed to be sewn to the backing, and then the pieces of felt turned inside out, so that the pile is on the inside of each pattern piece. As the plush backing does tend to fray, it's meant that each seam involved has needed to be over sewn too - so the creation process is quite long-winded.

This gives you an idea of what the Peacock began to look like as the "building up" process went along. The beak is in two pieces, using black felt. The "crown" was made by rolling up a small piece of left-over felt, and cutting thin tassel-like pieces half way down the finished roll. It results in a fairly recognisable peacock "crown", and we feel is acceptable for this particular purpose. After all, this is an experiment, isn't it? We just need it to be recognisable as a Peacock: not an exact replica!
Then the tail was created. Using the tail pattern piece, Isobel used the two different-sized pattern pieces for that part of the bird, and created a fan type final product. We cut out two pieces of the final tail piece, and on one of them, using coins as a template, Isobel created the circular peacock type eye decorations, and sewed them in place on the top piece of felt, with black double knit yarn knot as the centre piece, holding all the other colour pieces in place. She then sewed round the darker yellow felt bit to keep each decoration in situ. She then placed a backing piece, with wrong sides together and blanket-stitched the two pieces together, ending up with a tail piece like this, She used pinking shears to cut out the tail pieces - hoping to give an impression of feathers:

At this point, Isobel got in touch with the gentleman who originally, had gestingly suggested a Peacock Golf Club cover - to see if he might still be interested in having one as his special golf club cover. Initially, we don't think he was - he'd probably forgotten about it, and didn't want to be reminded! However, the next day, the gentleman emailed Isobel to say "great work: lovely colours. Keep me posted!" So, that's just what we have done, and will continue to do. (By the way, Isobel is a little bit surprised at herself at the moment: this is not her usual modus operandi, but we are both a little intrigued at how things are turning out! Perhaps, she should have been as bold as we feel we are being here, earlier?)
Meanwhile, Isobel was scrolling through past conversations with customers - as she does from time to time - and was reminded of an incident just before Christmas 2018, when a customer asked us to make some Mice Golf Club Covers. Now, other than Mickey Mouse and his Friends (all of whom would be taboo for us to use as models, due to copyright issues), mouse figures don't really lend themselves to becoming Golf Club Covers in the dimensions or pattern shapes we currently work with. So, Isobel did suggest the lady might like to have one of our Panda Golf Club Covers instead:
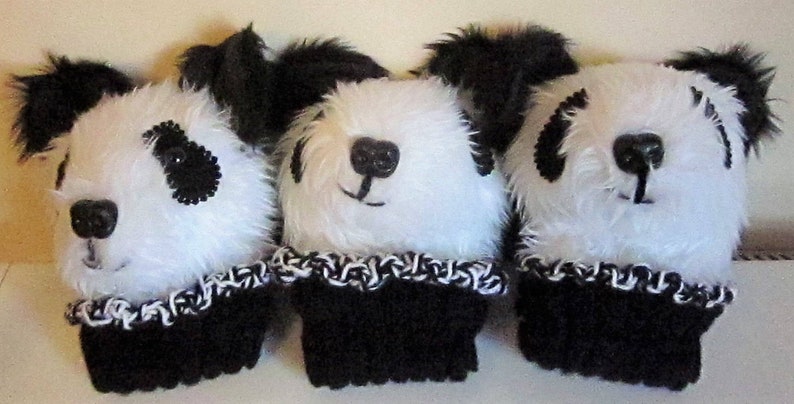 |
| https://www.etsy.com/listing/573989964/ |
However, she had trouble persuading her husband (for whom they were originally intended as Christmas presents that year!) to make up his mind (and during this week's contact, we discovered he'd gone ahead and got some for himself elsewhere!). At that time, Isobel did find out that the lady was a golfer herself (as she'd mentioned she might be interested in the Pandas herself ), so she was told about the Peacock project. We'd never really finished that original conversation, and two Christmases have intervened since, so Isobel felt it might be worth renewing contact! The outcome of that last exchange of convos, is that she, was pleased to be contacted, and she, too, asked to be kept informed about the Peacock, and would like to see the final outcome!! So, fingers crossed, if the original challenger isn't interested (he will be given first choice once (or if) the Peacock Golf Club cover is listed ), we might still have an interested buyer on the horizon. Exciting times, eh?
To get back to the Peacock saga - Isobel found some suitable eyes in our collection of such items, and added a white felt background for this latest Cuddly offering's facial features.
Then she starting putting the wings in place and sewing up the different parts of the body - tummy and back. It was at this point that Isobel thought the original wings were out of proportion to the rest of the bird, and the new wing format was decided on. (Making brand new Cuddlies is always a longer process than they become as they are repeated!)

She's not sure, if the finished product may not need a little extra stuffing, because the seams here don't seem to be as neat as Isobel likes to end up with. However, that decision is still for the future.

This is how the Peacock is now looking, with feet added, tail sewn in place (with the final decorative circle in place on it) and seen from the other side to our earlier photographs. (We think he's still looking a little thin in the body area!).
We now await the grand-putting together of the two golf club cover pieces. Current thinking is that once we've got a wider handle cover, and it slips over the wood head as easily as our other models do (which the original knitted version did not - too few stitches had been knitted on the needle) the top of the knitted handle cover will be gathered, to create a sort of "nest" on which the Peacock will be sewn. Then some elastic will be used lower down the knitted cover to create a pocket into which the golf club head can be housed - about 4-5 inches below the top : the elastic will have to be sufficiently long to easily slip over the wood head, because these covers tend to be replaced (and removed!) fast by the players when in use.
So, there's still some way to go - but we think we're nearly there! Am hoping matters will go smoothly, as life with Isobel is always much better when these experiments go well!!
Until next week, then: hope everyone has a good one.
Your Friend, Cy Bear.


